I really love this design from Threadless. I painted this with acrylic on canvas 18"x24". I really hope the recipient appreciated it because I miss it's presence on my wall. Especially around Halloween.
Showing posts with label Painting. Show all posts
Thursday, December 19, 2013
Thursday, October 24, 2013
Throwback Thursday - Coffee crafts
I was in a "I heart Coffee" swap and these are some things I made for my partner. I made the mug rack at her request and painted a celtic knot on it. She likes Irish themes so the quote on the mixed media piece says, “Only Irish coffee provides in a single glass all four essential food groups: alcohol, caffeine, sugar and fat.”
Thursday, May 10, 2012
Throwback Thursday - Paintings
![]() |
| Acrylic on canvas 12x24 |
For both paintings I tried to replicate pictures I saw online.
![]() | |||||
| Acrylic on Canvas 18x24 |
Thursday, May 3, 2012
Throwback Thursday! ATC's
Here are some ATC's I've made and traded. For those of you who don't know, ATC's (artist trading cards) are miniature pieces of art that are traded but never sold. The only rule is that it has to be 2.5inches by 3.5 inches. They can be drawings, paintings, stitched, paper, tin foil, wood; anything goes.
The person I made this paper collage for requested a personal haiku. This is the short story I based it on:
A five year old giggles while waving a jar
in the evening air. Her bare, little
feet, dance on the dew laden grass. Grandma’s
house has fireflies that come out at night to fly to the moon. The little girl swoops to scoop a firefly
into the jar and covers the opening with her hand. She proudly carries her mystical lamplight to
Grandma, who puts a lid on. The girl asks
to keep it forever. Grandma said that if
it stays in the jar it will be sad and won’t glow. The little girl took the jar and unscrewed
the top, watching the firefly flicker up, up towards the starry sky. That little girl was me but memory is hazy
now like a scene from a fairy tale.
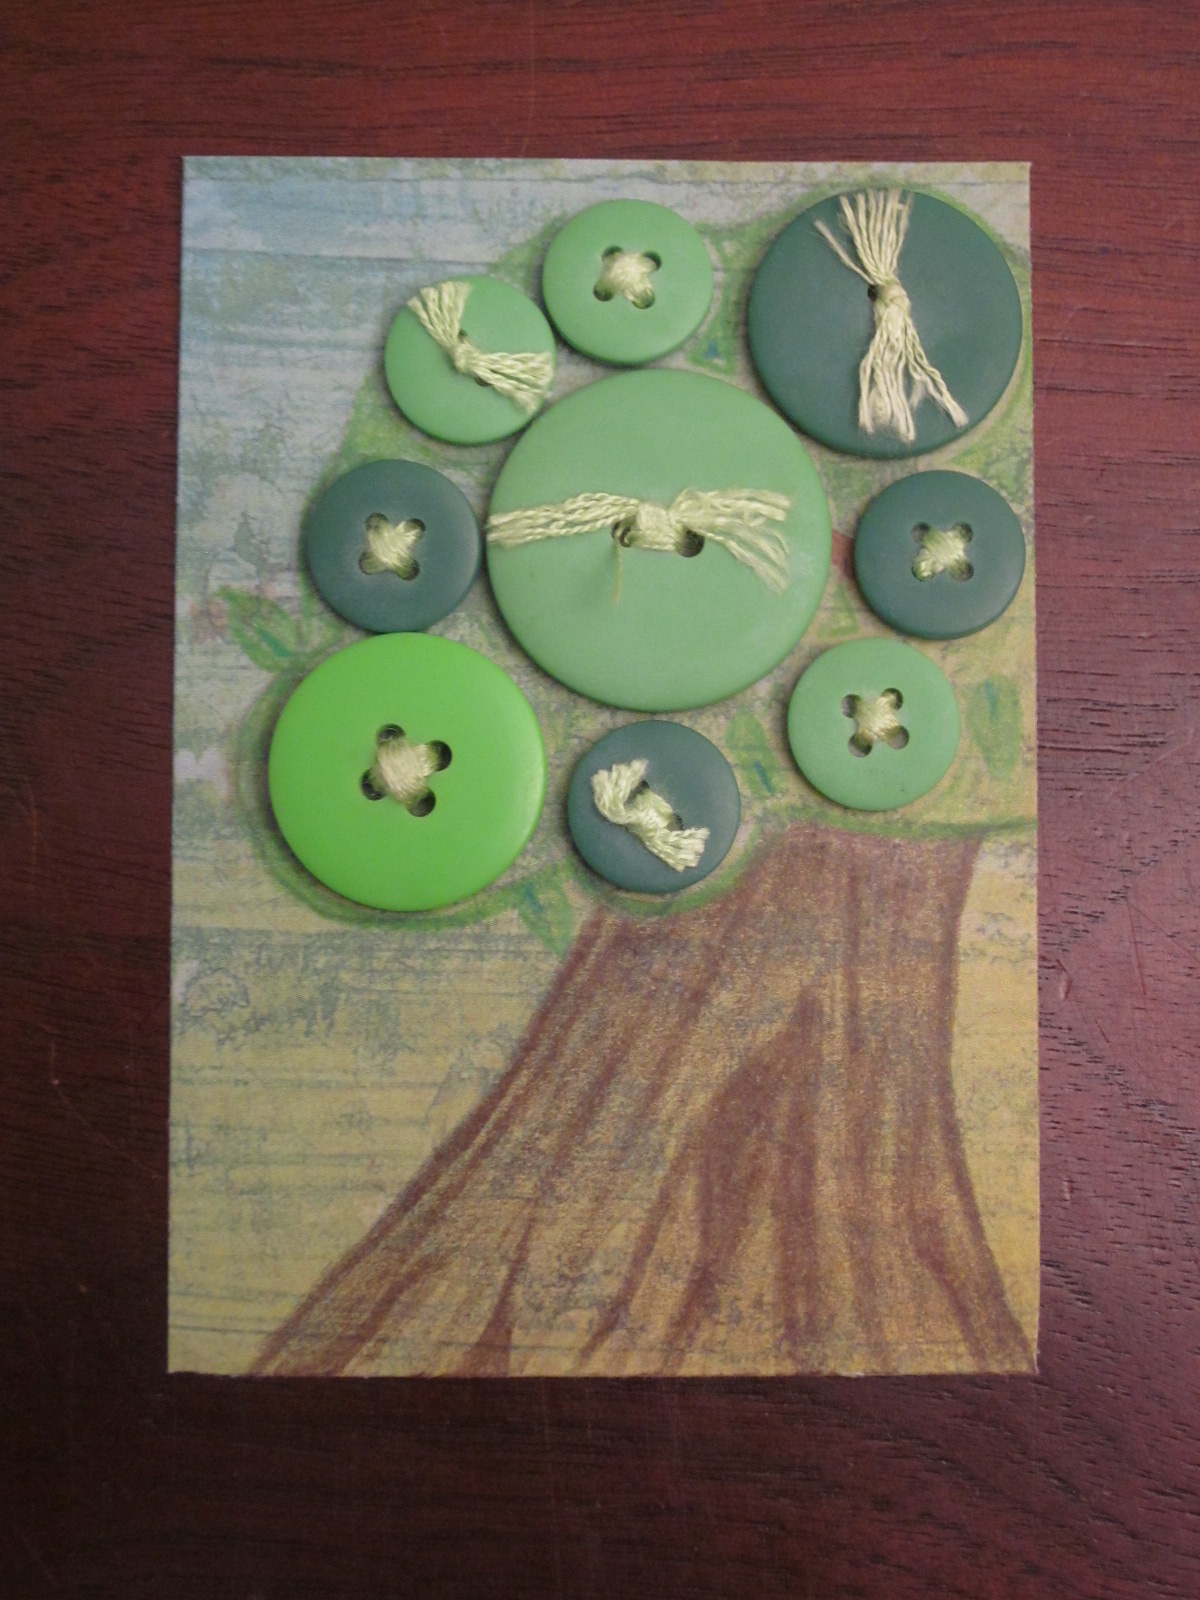
This is buttons and colored pencil on paper for a "tree" theme.
This stitched felt card was to help the recipient to spell out "kitchen"
This is Warhol's Marilyn done in accrylics on canvas board for the recipient's "mini works of art" theme.
This little guy in his cute hat was embroidered on cotton for the recipient's "owl" theme.
Thanks for looking! Let me know if you'd like to swap. I'd love to have an ATC made by you! :)
Thursday, December 8, 2011
Melted Crayon Paintings
So, I had been admiring the myriad of colors in recent melted crayon art. I wanted to take it to a new level though So I created "Phoenix". Its wax and acrylic on 18"x24" canvas. i must say I really enjoyed the process and am pleased with the outcome. I also felt quite honored that someone "favorited" it on Craftster.org and some others pinned it on pinterest.com. I was asked to make a tutorial on the process.
Crayon melting art is super easy and a fun. There are a few things I want to share with you that I’ve learned while doing this.
So how do you turn a crayon into a peacock?
Gather all your supplies before hand. I used a 24”x36” canvas. Since I was only using 3 colors of crayons (blues, greens, and purples), I needed 3 boxes. Goggles are recommended because the wax can spray if left melting in the gun, which is also why you want to cover your workspace with newspapers. I used a mini, high heat glue gun. It doesn’t come perfectly clean afterwards, so you may want one dedicated just for crayons. I got mine for $2.50 at Michaels.

I start out by sketching out an idea on paper and choosing where I want the colors. Then I lightly sketch an outline on the canvas so I can get my proportions correct the first time. You can’t get the wax off once its on so the only way to correct is to put a different color wax over it. Pencil will show through a thin layer of a light colored crayon so sketch softly.
Set your canvas or work surface at around a 45° angle to get the drip affect. An easel is nice but a can of beans will do the trick too.
To have more control and make the wax move slower, you can lessen the angle.
On the peacock I added some gem embellishments to the tail to represent the “eyes”. I hot glued these on first so that there was a flat surface for them to adhere to and so the wax would gather around them and seal them in.
Before you start melting, peel off the paper from all the crayons you want to use. This takes longer than I thought it would and would put a damper on your creative flow if you had to stop between each one. You may want to use a utility knife.
Insert the crayons pointed side first. The trigger may not work all the time because the crayon isn’t an exact fit, so you have to push with your thumb sometimes. Pushing the pointy end hurts.

Now the fun part! Start putting random drips on your canvas. There are different techniques you can use. The most common one I used on both the phoenix and the peacock was just simply putting the gun at one point and letting the wax drip down by itself. You can also “draw” with the gun, which is good if you need to outline, like I did on the body of the peacock.
For tiny places, like the beak and plumage, it may be difficult to control how much wax comes out. For these spots you can use the crayon to color straight onto the canvas and then use the tip of the gun to melt what you drew. You can get sharper details with much more control this way.
Fill in as much or as little as you want and you're done! I'm debating if I want to use acrylics to paint a background on this or leave it blank but the crayon part is finished.
There are some important things to remember. Your melted crayon art is still basically just crayons. They have a low melting temperature, so don’t put your art where it will be subject to heat. I know I’ve had crayon casualties in the car on a summer day. Also, crayons are breakable and in their melted form are even more fragile. If your work surface is canvas or something flexible, the wax can crack or fall off when its moved. You may want to put a sturdy back on it to make it stable. Also if your painting rubs against something, yup, you just made new crayon art on that too.
Both of these pieces are for trade or sale. SOLD
Crayon melting art is super easy and a fun. There are a few things I want to share with you that I’ve learned while doing this.
I start out by sketching out an idea on paper and choosing where I want the colors. Then I lightly sketch an outline on the canvas so I can get my proportions correct the first time. You can’t get the wax off once its on so the only way to correct is to put a different color wax over it. Pencil will show through a thin layer of a light colored crayon so sketch softly.
Set your canvas or work surface at around a 45° angle to get the drip affect. An easel is nice but a can of beans will do the trick too.
Insert the crayons pointed side first. The trigger may not work all the time because the crayon isn’t an exact fit, so you have to push with your thumb sometimes. Pushing the pointy end hurts.
Now the fun part! Start putting random drips on your canvas. There are different techniques you can use. The most common one I used on both the phoenix and the peacock was just simply putting the gun at one point and letting the wax drip down by itself. You can also “draw” with the gun, which is good if you need to outline, like I did on the body of the peacock.
Fill in as much or as little as you want and you're done! I'm debating if I want to use acrylics to paint a background on this or leave it blank but the crayon part is finished.
There are some important things to remember. Your melted crayon art is still basically just crayons. They have a low melting temperature, so don’t put your art where it will be subject to heat. I know I’ve had crayon casualties in the car on a summer day. Also, crayons are breakable and in their melted form are even more fragile. If your work surface is canvas or something flexible, the wax can crack or fall off when its moved. You may want to put a sturdy back on it to make it stable. Also if your painting rubs against something, yup, you just made new crayon art on that too.
Subscribe to:
Posts (Atom)